Wednesday, November 25, 2015

Pumpkin Bread

I'm squeezing in one last fall recipe!

A few weeks ago my daughter was learning about pumpkins in kindergarten, and she asked if we could make pumpkin bread. So we picked up a can of pumpkin and went in search of an easy recipe.

Easy is a must for me when it comes to baking. Too much measuring makes me crazy! So this recipe was perfect - easy ingredients and easy directions. The bread turned out perfectly moist and wasn't overly pumpkin-y or spicy like some pumpkin sweets can be. We enjoyed it for breakfast for a few days and I plan on making it again next year as soon as the leaves start to turn and pumpkin is available in the market!

Pumpkin Bread
Source: Cheese Curd in Paradise

Ingredients

  • 1.5 cups all-purpose flour
  • 1/2 tsp salt
  • 1 tsp baking soda
  • 1 tsp baking powder
  • 1 tsp cinnamon
  • 1/2 c vegetable oil
  • 1/4 c unsweetened applesauce
  • 1/2 tsp vanilla
  • 1 c sugar
  • 2 eggs, beaten
  • 1 c canned pumpkin
Directions
  • Preheat oven to 350 degrees
  • Spray a 9x5 loaf pan with non-stick baking spray
  • Stir together the flour, salt, baking soda, baking powder and cinnamon. Set aside.
  • In a large bowl or bowl of a stand mixer, combine oil, applesauce, vanilla and sugar. Mix until smooth.
  • Add the eggs and pumpkin.
  • Pour the batter into the prepared pan and bake for 1 hour.


Thursday, November 12, 2015

Vegetable and Quinoa Soup


A few weeks ago my husband and I had a date night and chose to dine at a Peruvian restaurant near us. We had been there before when they first opened and were excited to try more things off the menu. 

My husband chose ceviche for his app, and I went with a Peruvian Vegetable and Quinoa Soup. After my first bite, I knew I would be ordering this soup every time we go back. I also knew that I was going to need to recreate it at home. 

The next Last 

Last week I googled Peruvian soup recipes and while they all consistently had lots of vegetables and quinoa, I couldn't find any consistency in regards to seasoning and spices. So instead, I thought back to the soup I had at the restaurant - it was very simple, clean, and fresh. I decided to keep mine very simple with just a pinch of oregano and cumin as seasoning and guess what? It worked perfectly. 


I love the simplicity of this soup, both in preparation and flavor. And although it is a pretty light and healthy soup, it is definitely hearty enough to enjoy on its own. I ate it for lunch every day for 4 days in a row and was disappointed when it was gone.


Vegetable and Quinoa Soup

Ingredients
  • 1 Tbsp olive oil
  • 1/2 sm onion, chopped
  • 2 cloves garlic, minced
  • 1/2 each of these veggies, chopped into the same sized pieces: russet potato, red pepper, green pepper, zucchini, yellow squash, carrot, celery.
  • 1/2 c frozen peas, thawed
  • 8 oz canned chopped tomatoes, with juices
  • 8 cups vegetable broth
  • 1/2 c rinsed quinoa
  • 1/4 tsp cumin
  • 1/4 tsp oregano
Directions
  • Heat the olive oil in a large soup pot
  • Add the onions and saute 2-3 minutes, until softened
  • Add the garlic and saute for 1 minute
  • Add all of the vegetables except the peas; saute 2 minutes.
  • Add the peas and tomatoes; stir to combine.
  • Add the broth, quinoa, cumin, and oregano.
  • Bring to a simmer and then cover, simmering for 20 minutes until the quinoa and potatoes are cooked through. 


Tuesday, November 10, 2015

Gorgonzola Truffles


With the holidays approaching I see a lot of requests for appetizer recipes. I LOVE appetizers and could easily make a meal out of them. To check out all of my appetizers, click here. I have a nice mix of dips, spreads, cold, hot, easy, and fancy.

Last spring I hosted our neighborhood's girls' night and served an array of apps - 
Caprese Bites
Artichoke and Sundried Tomato Pesto Dip with Toasted Baguettes
Hummus and Pita Chips
Loaded Baked Potato Phylo Bites
Ham and Cheese Pinwheels on Whole Wheat Tortillas
Veggie Crudite with Dip
Gorgonzola Truffles with Pecans
And for our game tables I put out bowls of bar snacks and chocolate covered pretzels 
Dessert was a Sundae Bar with ice cream, brownies, and bowls of toppings 

These Gorgonzola Truffles were super easy to make. The original recipe called for coating them in bacon - doesn't that sound heavenly? I am a strong believer that bacon makes everything better, but the ONLY reason I didn't not use bacon was because I already had bacon in another app. I thought pecans (or walnuts) would be a nice change. 

I made these a bit smaller than the recipe recommended, and the next time I'd make them even smaller. They are very rich and it would be nice if they were truly one-bite. What I loved about them is I could prep the mixture the day before and roll them into balls once the mixture was firm. Once I was ready to serve, all I had to do was roll them in the pecans. 

Gorgonzola Truffles
Source: The Way to His Heart
Ingredients
  • 4 oz cream cheese, softened
  • 4 oz crumbled Gorgonzola cheese
  • 2 tsp finely chopped onion
  • 1/2 tsp Worcestershire sauce
  • 1/4 tsp black pepper
  • 1/2 c pecans, roughly chopped or gently crushed (or for the original recipe, use bacon)
  • Apple slices, pear slices, grapes (optional), for plating and serving
Directions
  • Beat the first 5 ingredients at medium speed with an electric mixer until well combined. Cover tightly and chill at least one hour until firm (or up to 3 days). 
  • Roll the cheese mixture into balls (I recommend 1/2 inch). Roll in the nuts and serve immediately. 

Thursday, November 5, 2015

Grilled Chicken and Vegetable Tostadas


I feel like it was just summer, but here we are nearing Thanksgiving and dealing with darkness at 5 PM. In some ways I like that it gets dark early because my nights feel longer (and my Kindergarten kid feels like she is staying up "really, really late!!!" although she catches on after a few days... ). I also tend to go to bed a bit earlier this time of year, which is always a good thing. But if I have to drive at night, forget it. I hate driving in the dark (part of that may be because I could probably use glasses for night driving but I just haven't gotten them yet. Getting old is tough!). 

I usually turn to comfort food this time of year - creamy dishes, casseroles, soups, and stews. But eating like that just isn't good for my waistline (another problem with this whole getting older thing). So I'm changing things up and sticking to lighter meals and less carbs and sugar. A big perk to this recipe is that it makes it feel like spring or summer. 
I stumbled across this recipe by Cooking Light when looking for ideas for grilled chicken. Yes, you can grill even if it is dark. Just put on an outside light or get one of those clip on lights made specifically for grilling at night. We will (I mean, my husband will) grill year round as long as it isn't the middle of a blizzard and we can't get to the grill. 
 I liked that the tortillas were crisped in the oven, and not fried. I used that as my inspiration for this dinner, and changed up the ingredients and directions, including marinating and grilling my chicken. We all loved these and were able to personalize them, using ingredients we all liked from the pile of veggies that we grilled. The tortillas were very crispy and we were able to pick them up to eat like a tostada or pizza. 


Grilled Chicken and Vegetable Tostadas
Inspired by: Cooking Light
Ingredients
  • 1 lb of chicken (I used boneless breasts - use what you like)
  • Marinade: 1/2 c olive oil, 1/4 tsp cider vinegar, 1/2 tsp cumin and chili powder, 2 cloves crushed garlic, handful of cilantro, juice from 1/2 of a lime, zest from 1/2 of a lime. 
  • 1/2 of a red onion sliced into rings
  • 1/2 each green and red pepper sliced into large pieces (if there are 4 "sides" to your pepper, cut off 2 of them)
  • 1 sm zucchini, halved lengthwise
  • 1 sm yellow squash, halved lengthwise
  • 8-10 grape or cherry tomatoes on a skewer
  • Olive oil spray, salt and pepper
  • 1 c Monterrey Jack cheese, shredded
  • 6 sm flour tortillas
  • Fresh cilantro, chopped
  • Optional: sour cream, for serving
Directions
  • Mix all of the marinade ingredients except the lime juice and zest. Pour over the chicken in a shallow bowl; cover and marinate in the fridge 8 hours to overnight. 1 hour before cooking, add the lime juice and zest. 
  • Spray all of your veggies with olive oil and season lightly with salt and pepper
  • Heat your grill and grill the chicken until it reaches 160 degrees; let rest 5-10 minutes and then chop into bite sized pieces. 
  • Grill your veggies for a few minutes until very lightly charred; chop them into bite sized pieces.
  • Turn on the broiler in your oven. Spray the tortillas with olive oil spray and place on a cookie sheet under the broiler for 2 minutes. Flip and broil another 1-2 minutes.
  • Remove the tortillas from the oven and top with the chicken, veggies, and then cheese.
  • Return them to the oven under the broiler until the cheese has melted.
  • Top with fresh cilantro. 

Tuesday, October 13, 2015

Breakfast on the Go - Egg Muffins


There's nothing like a big breakfast at home, and I don't mean just the food. It's having the time to lounge around and enjoy a leisurely breakfast in your PJs while spending time with your family. However, even on the weekends it is rare to have the time for a lazy breakfast.

One of my favorite things to make when I cook a big breakfast is a fritatta, but who has time for that on a busy weekday morning? Just because you don't have the time for a fritatta doesn't mean you need to grab a bagel and run. Instead, turn your favorite omelette or fritatta into a muffin and you have breakfast that will travel easily and reheat well.

You can make these with any combination of ingredients that you like. There are just a few general steps -

  • Beat the eggs (4 extra large or 5 large eggs will make 6 muffins)
  • Saute your meat and veggies
  • Add meat and veggies to eggs
  • Pour into muffin tins
  • Bake for 15-20 minutes
For meat I often use ground breakfast sausage, but you can also use cooked, crumbled bacon or diced ham. My veggies are usually red onion, tomatoes and spinach, but you can really use anything you want - green onions, peppers, kale, arugula, broccoli, small pieces of cooked, diced potato, asparagus, etc. 


Once cooled I wrap them in packs of 2 and will reheat them for breakfast for up to 3 days. To reheat, just pop them in the microwave on medium for 15-20 seconds.

Ingredients

  • 4 Extra large or 5 large eggs
  • Salt and pepper
  • 2 Tbsp light cream or milk
  • Optional: shredded cheese
  • 1/3 c ground breakfast sausage
  • Chopped veggies, about 1/2 c total
  • Olive oil
Directions


  • Preheat oven to 400 degrees
  • Grease your muffin tins or use cupcake liners
  • In a large mixing bowl, beat eggs with salt, pepper, and cream. Stir in the cheese, if using.
  • Heat olive oil in a saute pan; add meat until browned. Add veggies and cook until tender. 
  • Add veggie/meat mixture to eggs and stir.
  • Ladle egg mixture into muffin tins, filling to 1/4 inch below the top.
  • Bake 15-20 minutes, or until the eggs are set and the tops just start to lightly brown.


Tuesday, October 6, 2015

Pork with a Lemon Dijon Pan Sauce

Pan sauces are such a great way to add some flavor to your meat, and to use up all the crispy little brown bits in the bottom of your pan. They are also usually quick dishes to make - perfect for a busy weeknight. Even better, this one had little prep involved.

Because of that I was able to make a creamy mushroom risotto to go along with the pork. Don't worry, we also had a veg. I snapped this pic while the green beans were steaming :)


I first tagged this recipe when I saw it on Kylee Cooks. I love using Dijon mustard in sauces, and I knew mixing it with lemon and Worcestershire would give it both brightness and depth.

We all loved this! The sauce was so amazing that I kept adding more to my pork as I was eating. I made a few minor changes, including adding chicken broth so we'd have more sauce. I also didn't have lemon pepper seasoning so I used freshly grated lemon zest, salt, and pepper.

Enjoy!

Pork Chops with a Lemon Dijon Pan Sauce
Adapted from: Kylee Cooks

Ingredients
  • 4 thin sliced pork chops
  • Zest of one lemon
  • Salt and pepper
  • 1 Tbsp butter
  • 1 Tbsp olive oil
  • 3 Tbsp lemon juice
  • 1.5 Tbsp Worcestershire sauce
  • 1.5 tsp Dijon mustard
  • 1/2 c low sodium chicken broth

Directions

  • Combine the lemon juice, Worcestershire and Dijon mustard in a small bowl; set aside
  • Rub the chops with the lemon zest and season with salt and pepper
  • In a large saute pan (I like to use my stainless pans for a good sear), heat butter and oil over medium heat
  • Add the chops and cook 4-5 minutes per side until a thermometer reads 140 degrees. Remove to a plate and let rest
  • Turn the heat to medium high and add the chicken broth to deglaze the pan - scrape up all of those brown bits!
  • Add the mustard/lemon/Worcestershire mixture and stir. Let simmer for a few minutes until slightly thickened.
  • Return the chops to the pan, lower heat, and let simmer for 2 minutes.
  • Serve the pork chops topped with some of the sauce. 

Thursday, July 30, 2015

Pork Carnitas


I am slowly starting to use my crock pot a bit more often. So far I am loving it for shredded or pulled meat - beef, chicken, or pork. The crock pot makes it so tender that it just falls apart with 2 forks - barely any effort required!

Last week I made pork carnitas in the crock pot. 5 minutes to get it cooking? Yes, please! Even better, it only requires a few ingredients.

The most important step, in my opinion, was browning and crisping the pork after shredding it. I loved the added texture and crunch from the caramelized brown bits on the pork. Once I browned the pork I served it over rice with some fresh cilantro. Next time I will make some nice street style tacos with the meat, queso fresco, pickled red onions and cilantro.

Pork Carnitas
Source: RecipeTin Eats

I cut the recipe in half and used a different cut of meat. The ingredients below are based on how I made the pork.

Ingredients
  • One 2.5-lb pork loin (I prefer using a loin over a shoulder - less fat to deal with when shredding)
  • 1 tsp each salt and pepper
  • 1 Tbsp dried oregano
  • 2 tsp dried cumin
  • 1 Tbsp olive oil
  • 1 onion, coarsely chopped
  • 1 jalapeno, chopped (remove the ribs and seeds for less heat)
  • 4 cloves garlic, minced
  • 1 c orange juice
Directions
  • Season the pork with salt and pepper.
  • Mix the oil, oregano and cumin; rub all over the pork.
  • Place the pork in your crock pot, fat cap up.
  • Top with the onions, jalapenos and garlic, and then pour in the orange juice.
  • Cook on low 8-10 hours or high for 6 hours.
  • Skim off the fat and shred the meat using 2 forks. Keep warm.
  • When ready to eat - heat 1 tsp olive oil in a sauté pan (stainless steel preferred). Add one serving of pork and cook until the bottom side is golden brown and crusty.
  • Serve over rice or in tacos. Use the extra juices if you'd like and top with cilantro.


Monday, July 27, 2015

Mexican Grilled Corn Salad with Citrus Aioli


One of the summer's stars is definitely fresh, sweet corn.

I have mentioned this in my blog before that every week or 2 in the summer, my dad drives across the river to a small farm stand in NJ. He always comes back with the best tomatoes, zucchini, and of course, corn.

I like corn on the cob, but my favorite way to enjoy this summer treat is off the cob. The other night I decided to take it out of the husks and grill it for a salad.

If you have corn to use, make this salad. I thought it was out of this world good! There are so many flavors going on that just WORK together - the sweet corn, the salty cheeses, the bright cilantro and the bright and creamy dressing - seriously, O.M.G. good!


I made a few minor changes by adding grilled red onion, omitting the melted butter, changing the quantities, serving it at room temp (not hot), and in general changing how it was all put together (I simplified it). I plan on making this for every gathering I have as well as every one I go to for the rest of the summer - it was THAT good! So please do yourself a favor and make this ASAP. You will thank me!


Mexican Grilled Corn Salad with Citrus Aioli
Adapted from: Food and Wine
Ingredients
(serves 4)
  • 5 ears of corn, shucked and cleaned
  • 1/4 of a large red onion, sliced into rings.
  • Olive oil, salt, and pepper
  • 1/3 c mayonnaise
  • 1/4 tsp finely grated lime zest plus 3 Tbsp fresh lime juice
  • 1/4 tsp finely grated lemon zest plus 1 Tbsp fresh lemon juice
  • 1/2 Tbsp extra virgin olive oil
  • 1/4 tsp Dijon mustard (or more, if needed, after tasting)
  • 1 clove garlic, grated
  • 1/4 tsp cayenne (or less - depends on how much heat you want)
  • 1 oz crumbled queso fresco
  • 1 oz crumbled cotija cheese
  • handful each of fresh parsley and cilantro, chopped
Directions
  • Make the aioli: mix the mayo, lime zest, lime juice, lemon zest, lemon juice, 1/2 Tbsp olive oil, Dijon, garlic, and cayenne. Season with salt. This can be made ahead of time and refrigerated.
  • Heat your grill to high. Brush the corn and red onion with olive oil and season with salt and pepper. Grill the corn 8-10 minutes until cooked and slightly charred. Let cool before cutting the kernels off the cob and chopping the onion.
  • Toss the corn kernels and chopped onion with the cilantro and parsley. Add in the dressing slowly (I didn't need to use all of mine) and then add in the cheeses. Season with salt and pepper, if needed.
  • Serve immediately.  


Wednesday, July 22, 2015

Grilled Lemon-Oregano Chicken and Chopped Vegetable Salad


Lemons inspired part of this meal. I had a bunch to use, so I came up with a lemon, oregano and garlic marinade for chicken. And on a 90 degree day, grilled chicken over a crisp and cold salad is the perfect dinner for me.

My other inspiration came from 2 ciabatta rolls sitting on my counter. My favorite thing in a summer salad - grilled ciabatta bread. Cut a ciabatta loaf (or a roll for a smaller salad/less people), spray with olive oil and season with salt and pepper. Grill until charred to your liking and then slice into bite sized pieces.

Grilled Lemon Oregano Chicken and Chopped Vegetable Salad

The Marinade
  • 2 boneless, skinless chicken breasts
  • 1/2 c light olive oil
  • Juice from 1 lemon
  • 2 cloves garlic, minced
  • 1/2 tsp red pepper flakes
  • 1/2 tsp onion powder
  • 1 Tbsp dried oregano
Combine all ingredients and pour over the chicken. Marinate, covered, in the fridge for at least 4-6 hours.  Heat grill to high and grill chicken until internal temperature reaches 165 degrees. Let rest 5 minutes before slicing and serving over the salad.

The Salad

You can use whatever you'd like. My salad consisted of:
  • Mixed greens
  • Sliced red, green, orange and yellow peppers
  • Chickpeas
  • Marinated artichokes
  • Cucumbers
  • Fresh mozzarella
  • Fresh basil
  • Grilled ciabatta bread.
  • Salt and pepper
I didn't need to add dressing - the marinated artichokes, basil, salt and pepper added enough flavor.


Thursday, April 30, 2015

Grilled Vegetable Pasta in a Garlic Broth with Basil


You know how they say you shouldn't go to the supermarket hungry? Well you also shouldn't try to write a food blog post when you are hungry. I am sitting here staring at the picture of this pasta and the only thought I have in my head right now is how badly I'd love to eat it.

So after giving you one tip, I'm going to let the pictures do the talking in this post. The next time you grill veggies for dinner, make extra so you can chop them up for this pasta dish the next night. Not only will you save time and have dinner on the table in less than 15 minutes, you'll get the great flavor of grilled veggies infused into a light and fresh pasta dish.


Grilled Vegetable Pasta

Ingredients

  • 1 Tbsp olive oil
  • Leftover grilled veggies, chopped
  • A few cherry tomatoes
  • 2 cloves garlic, chopped
  • 1/2 c low sodium chicken or vegetable broth OR 1/2 c pasta water
  • 8 oz pasta
  • Salt and pepper
  • Fresh basil, roughly chopped
  • Optional: fresh mozzarella, chopped

Directions

  • Cook pasta until done to your liking; drain, reserving 1/2 c of the pasta water (unless you are using broth)
  • Heat the olive oil in a large sauté pan over medium high heat
  • Add the garlic and tomatoes; sauté 2-3 minutes being careful not to burn the garlic
  • Add the veggies and toss to warm
  • Add the broth or pasta water, and season to taste with salt and pepper. Bring to a low simmer.
  • Add the pasta and toss with the veggies.
  • Top with basil and mozzarella


Friday, April 24, 2015

Lemony Spinach and Chic Pea Soup


Although it's spring I still love to make soup for lunches. I look for lighter recipes using a lot of vegetables and fresh flavors, like lemon and cilantro.

This soup that I came across in Cooking Light sounded like the perfect spring soup, and it was. It was filling for lunch and was healthy, too, so I felt good about it. I loved the lemon with chic peas and spinach - a new perfect flavor combination for me!

I made only a few changes to the original recipe, including using less orzo so it wouldn't be packed with pasta. Enjoy!

Lemony Spinach and Chic Pea Soup
Source: Adapted from Cooking Light
Ingredients
  • 1 Tbsp olive oil
  • 3 garlic cloves, sliced
  • 2 green onions, chopped
  • 4 cups low sodium chicken broth
  • 2 cups water
  • 1/2 c uncooked orzo
  • 1 Tbsp grated lemon rind
  • 1 15oz can chic peas (garbanzo beans), drained and rinsed
  • 1 tsp dry oregano
  • 1 Tbsp lemon juice
  • 1/2 tsp black pepper
  • 1/4 tsp salt (or to taste)
  • 6 oz fresh baby spinach
  • Optional: 1/3 c Parmesan cheese
Directions
  • Heat a large saucepan over high heat.
  • Add olive oil to pan; swirl to coat.
  • Add garlic and onions; sauté 30 seconds, stirring constantly.
  • Add chicken broth and 2 cups water; bring to a boil.
  • Add orzo, lemon rind, and chickpeas. Cover and cook 10 minutes or until orzo is done.
  • Stir in oregano and next 4 ingredients (through spinach).
  • Ladle 1 3/4 cups soup into each of 4 bowls; top each serving with about 4 teaspoons cheese.


Tuesday, April 21, 2015

Creamy Pasta with Bacon


If I'm going to make a comforting pasta dish, I'm really going to go for it and forget about low carb, low fat, etc. It has to be creamy, rich and hearty, cheesy, and the addition of bacon never hurts.
Whenever my friend Jen comes to visit I always make a creamy pasta dish one of the nights, and since it was still freezing cold when she was here the last time, I was excited to make a comforting dish.

I was inspired by this recipe for Pasta with Mascarpone, Garlic, Spinach and Crumbled Bacon from the blog Week of Menus. I changed up a few ingredients and some of the steps and was so happy with the final dish - it was exactly what I wanted it to be.

Note - the mascarpone doesn't have much flavor, so if you are going to use it as a base for your sauce, I suggest using a second cheese and also some stock instead of the reserved pasta water.

Creamy Pasta with Bacon
Adapted from: Week of Menus
Ingredients
  • 1 lb of bowtie pasta
  • 6 slices of bacon
  • 1/2 Tbsp olive oil
  • 2 cloves of garlic, minced
  • 3/4 c frozen peas
  • 1/2 c mascarpone cheese
  • 1/2 c low sodium chicken stock
  • Shredded Parmesan cheese
  • Black pepper
Directions
  • Cook pasta until done to your liking; drain and set aside.
  • In the meantime, heat a large skillet over high heat. Add the bacon and cook until crispy. Using a slotted spoon, transfer to a plate lined with paper towels. Discard all but 2 Tbsp of the bacon grease.
  • Lower the heat the medium and add the olive oil. Add the garlic; sauté 1 minute.
  • Add the peas and mix, followed by half of the broth
  • Whisk in the mascarpone until creamy, adding broth if it gets too thick
  • Add the Parmesan cheese and black pepper to taste
  • Add the pasta, tossing to coat
  • Top with the crumbled bacon and serve immediately.

Monday, April 13, 2015

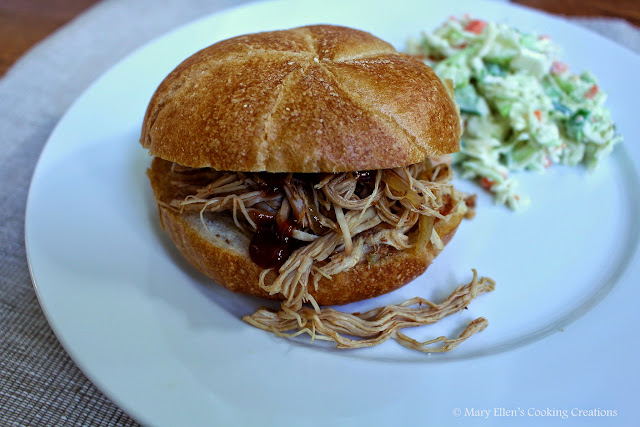
Guinness Pulled Pork


My rarely-used crock pot may start to get a workout after it was used to make this pork. We just had it last week and I already want it again - it's that good. So good that I had 2 sandwiches at dinner, as did my husband and best friend.

The pork starts with a simple rub - I added a few things to the original recipe to spice it up a bit and also increased the quantities. Then you layer sliced onions in the bottom of the pot, top with the pork and then pour in the Guinness. I think I spent 8 minutes on the prep.

Here is the pork before I poured in the Guinness -


The pork became so tender while cooking that I didn't even need to pull it out to shred it - I just used a fork and my tongs and barely needed to use any effort to make it fall apart.

The three of us all built our sandwiches differently - I put some cole slaw on the bottom of the bun followed by the pork and then some Sweet Baby Ray's original BBQ sauce. My friend kept it simple with just pork and sauce while my husband layered his with cole slaw, pork, and dill pickles.

The leftovers are amazing... make another sandwich or make my favorite, NACHOS!! Enjoy!
 
Guinness Pulled Pork

Ingredients
  • 1 large white onion, thinly sliced
  • 4 cloves garlic, roughly chopped
  • 1.5 Tbsp paprika
  • 1/2 tsp dried thyme
  • 1 Tbsp kosher salt
  • 1 tsp crushed red pepper
  • 1 tsp onion powder
  • 1/2 tsp cayenne pepper or more! 
  • 1 tsp freshly-cracked black pepper
  • 4 pound boneless pork butt, shoulder or loin cut into chunks so it lies flat in the pot
  • 1 (14 oz) can Guinness
  • 2 Tbsp Worcestershire sauce (or soy sauce if you don't have Worcestershire)
  • For serving: rolls, pickles, cole slaw and your favorite BBQ or Hot Sauce 
Directions
  • Lay the onions and garlic over the bottom of the pot
  • Mix together all of the spices and then rub generously over the pork.
  • Place the pork over the onions and then pour in the Guinness and Worcestershire
  • Cook on high for 6 hours and then turn to low for 2. Shred and keep warm until ready to serve.
  • Serve with pickles, BBQ or hot sauce and cole slaw.


Tuesday, April 7, 2015

Grilled Thai Chicken Salad


Grilling season is finally here in the Northeast! This opens up an endless number of meal options as we grill everything - meat, fish, veggies, potatoes, even noodles in a foil packet.

I tend to eat healthier when we grill. No creamy, cheesy sauces; no breaded chicken or chops, and nothing fried. My favorite grilled meal is marinated chicken with a hearty salad, like this Thai Chicken Salad. I actually made this one last fall and can't wait to fire up the grill to make it again soon.


Grilled Thai Chicken Salad
Ingredients
The Marinade -
  • 1/2 c rice vinegar
  • 1 Tbsp hoisin sauce
  • 2 cloves garlic, minced
  • A few dashes of cayenne pepper
  • 3 Tbsp soy sauce

The Salad
  • 2 boneless, skinless chicken breasts
  • 1 bag broccoli slaw
  • 1/2 head of bok choy, chopped (except for the top 2-3 inches)
  • 3 green onions
  • 1/2 cucumber, chopped
  • Optional: cilantro
The Dressing
  • 1/2 c olive oil
  • juice from 1/2 of a lime
  • 1 Tbsp soy sauce
  • 1 Tbsp honey
  • 1 Tbsp peanut butter
  • 1 tsp spicy Thai chili sauce
Directions
  • Mix the marinade ingredients and pour over the chicken. Marinate in the fridge for at least 8 hours.
  • Mix the salad ingredients; keep cold until ready to serve.
  • Make the dressing shortly before dinner - just mix everything well, taste and adjust.
  • Grill the chicken until internal temperature reaches 165 degrees. Remove from the grill and let rest at least 5 minutes. Slice and serve.


Wednesday, April 1, 2015

Skillet Baked Rigatoni


This is an almost one pot meal - it all cooks in the skillet after the pasta boils in a pot. Two pots though, that's still a pretty easy cleanup!

I used the Skillet Lasagna recipe that I recently made as inspiration. I mixed instead of layering, but everything else was pretty much the same.

It took about 25 minutes to prep, and that includes the time to boil the water and cook the pasta. After that it goes into the oven for 20 minutes, giving you plenty of time to wash the one pot and then open a bottle of wine.

Skillet Baked Rigatoni

Ingredients
  • 12 oz rigatoni
  • 1 lb ground beef (I use 96%)
  • 1/2 medium onion, diced
  • 3-4 cloves of garlic, minced
  • 14 oz crushed tomatoes
  • 8 oz of your favorite tomato sauce
  • Red pepper flakes to taste
  • 6 oz part-skim ricotta
  • 8 oz shredded Italian blend cheese (mozzarella and Parmesan)
  • 2 pinches of salt
  • 2 pinches of black pepper
  • Handful of chopped fresh parsley (or 1 Tbsp dried)
Directions
  • Bring a pot of water to a boil; salt and then cook the pasta according to directions. Drain.
  • Heat a large sauté pan (oven safe) over medium-high heat. Add the ground beef and cook, crumbling, until almost cooked through.
  • Add the onions and garlic; cook, stirring, 2-3 minutes
  • Add the tomatoes, tomato sauce and red pepper flakes. Bring to a simmer for a few minutes.
  • In the meantime, mix the ricotta, 6 oz of the shredded cheese, ricotta, salt and pepper
  • Remove half of the meat mixture (just to make it easier to mix without making a mess) and pour half of the cooked pasta to the skillet as well as half of the cheese mixture. Stir to coat.
  • Add the rest of the meat, pasta, and cheese mixture; mix.
  • Top with the remaining shredded cheese.
  • Cover and bake on 400 degrees for 20 minutes.


Tuesday, March 24, 2015

Chicken and Bok Choy


Meal planning - do you do it?

Meal planning takes so much stress out of the week mostly because I shop once and I know what we are having every day. I'm not scrambling to think of things at the last minute and running to the store daily. I make healthier decisions. And finally, I save money because I plan around what is on sale that week and I reuse ingredients so nothing is wasted - like that big bag of peppers I get at the produce market is used on Monday for one dish and Thursday for another.

When I'm planning I also think about what is going on every day and find that I often need quick and easy meals. Stir fried meats and veggies always make it on my list - so much prep can be done ahead of time and the cooking time is usually only as long as it takes the rice to cook (unless you use the Trader Joe's frozen brown rice - ready in just 3 minutes!).

This Chicken and Bok Choy fits many of my requirements - healthy, full of flavor, well rounded, and of course, quick and easy.


Chicken and Bok Choy
Adapted from: NY Times
Ingredients
  • 2 Tbsp low sodium soy sauce
  • 2 Tbsp rice wine vinegar 
  • 1.5 T sesame oil
  • 2 tsp light brown sugar
  • 2 large boneless chicken breasts, cut into 1/2 inch strips
  • 2 Tbsp finely chopped ginger
  • 2 cloves garlic, chopped
  • 3 Tbsp vegetable oil
  • 1 head bok choy, washed, trimmed (discard about 1 inch of the very green tops and 1-2 inches of the white bottoms) and thinly sliced
  • 1 sm onion, thinly sliced       
  • Pinch of red pepper flakes
  • 1/4 c low sodium chicken broth
  • Cooked rice, for serving
Directions
  • In a medium bowl, whisk together soy sauce, vinegar, sesame oil, and sugar. Pour half the mixture over the chicken, along with half the ginger and half the garlic. Let stand 20 minutes.
  • Heat a large, 12-inch skillet over high heat until extremely hot, about 5 minutes. Add 1 Tbsp vegetable oil and the chicken. Cook, stirring constantly, until meat is cooked through, about 3 minutes. Transfer to a plate.
  • Add the remaining oil to the skillet.
  • Add the bok choy and cook 1 minute.
  • Stir in the onions, ginger, garlic and chili flakes; cook, tossing frequently until bok choy and onions are tender, about 1 minute.
  • Stir in the marinade and chicken broth and let simmer 1 minute.
  • Return chicken to skillet and combine with ginger, garlic, and vegetables. Serve immediately, over rice.


Monday, March 9, 2015

The Best Chewy Cafe-Style Chocolate Chip Cookies


Snow days and baking - they just go together.
Last week we had what I hope will be our last snow storm of the year. It was a good one, too, with about 10 inches of light and fluffy snow. We played outside for a bit and when we came in, we got to work baking.
I have made chocolate chip cookies in the past and have had success with some recipes and have had major failures. So before we went out to play, I searched for a really good chewy cookie recipe. I found one and after reading all of the amazing reviews I had to try it. My 4 year old had SO much fun making these - she did all of the measuring and formed the cookies.
Now, my husband is VERY honest giving his feedback on things I make. He always does it in a constructive way, like saying that the dish could use more heat, more salt, more texture, etc. So when I popped one of these cookies in his mouth as he was going by the back door with the snowblower and he immediately raised his eyebrows in a "wow" way, I knew they were good. Later he said they were the best cookies I ever made. I agree! We ate a few right out of the oven and they were crispy on the outside and super gooey and chewy in the middle. Even better, once they cooled they stayed that way. This will definitely be my go-to chocolate chip cookie recipe.
Chewy Café-Style Chocolate Chip Cookies
 
Ingredients
  • 2 cups + 2 tablespoons all purpose flour
  • 1 teaspoon baking soda
  • 2 teaspoons cornstarch
  • ½ teaspoon salt
  • 1 ½ sticks (6 oz) butter, melted and cooled
  • 1 cup light brown sugar, lightly packed
  • ½ cup granulated sugar
  • 2 large eggs
  • 2 teaspoons vanilla extract
  • 1½ cups dark chocolate chips (I used semi-sweet chocolate chips which the author recommends for better melting)
Directions
My notes in italics
  • In a medium-sized bowl, whisk together the flour, baking soda, cornstarch, and salt. Set aside.
  • In a large bowl, beat together the cooled melted butter and the sugars with a hand mixer (I used my Kitchen Aid on speed 2) for about one minute. Then, add in the eggs and vanilla extract. Beat until just combined.
  • Slowly add in the dry ingredients and mix briefly, just until there are no flour clumps left. Fold in the chocolate chips.
  • Cover and refrigerate the dough for 30 minutes to an hour.
  • Remove the dough from the refrigerator and preheat the oven to 325 degrees, making sure you have the racks in the middle of the oven.
  • Scoop ¼ cup of cookie dough at a time and roll into balls (I made mine just a bit smaller - they were still really big cookies!!!). Then, tear the balls in half by pulling gently on both sides. Smush the two halves together again, but this time have the lumpy, torn sides face upward. Place on a baking sheet lined with parchment paper, making sure the cookies have plenty of space to spread.
  • Bake for about 12 minutes, rotating half-way through, or until the cookies have spread out and the edges are golden, but the center of the cookie still looks soft and just slightly under-cooked. Let cool on the baking sheets until the cookies are firm enough to remove. Note from author: Every oven is different, so I recommend starting with just one or two cookies on the tray to see what baking time works best for you! I baked the cookies for 13 minutes and they were perfect.
  • Repeat with remaining batches, until all cookies are baked.


Tuesday, February 24, 2015

Quinoa with Kale


Looking for a healthy lunch that is quick and easy to prepare and will fill you up without any guilt? This quinoa with kale is it.


Quinoa is not only delicious and versatile, it has so many great health benefits. Check out this article on the 27 Surprising Health Benefits of Quinoa by The Cooking Detective.  Once you do you will be running to the kitchen to cook up some quinoa!!

I have made quinoa as side dishes, soup, and salads. For this dish I sautéed some onions, garlic and tomatoes before adding the quinoa and broth. Near the end of cooking I added in some kale, my new favorite leafy green, and let it wilt.


Once it cooled I packed it immediately in to some lunch containers so I'd be ready to go. I warmed this up to eat it but it would also make a great salad when the temps are a bit warmer.


Quinoa with Kale

Ingredients

  • 1 Tbsp olive oil
  • 1/2 sm onion, diced
  • 2 cloves garlic, minced
  • 1 c cherry or grape tomatoes, halved
  • 1 c quinoa, rinsed
  • 3 c chicken or vegetable broth
  • 1 sm bunch kale, roughly chopped
  • salt and pepper to taste, if needed
Directions
  • Heat olive oil in a large sauté pan over medium high heat
  • Add onions and garlic, sauté 2 minutes
  • Add tomatoes, sauté 1 minute
  • Add quinoa and stir before adding broth. Bring to a simmer and then lower heat to medium. Let simmer about 10 minutes.
  • Put the kale in the pan and let it wilt down for a minute or two. Once it starts to wilt, stir to mix it in to everything. Let the quinoa simmer until cooked through, about another 5 minutes.
  • Season with salt and pepper if needed


Wednesday, February 18, 2015

Roasted Vegetables and Graziano Marinara Sauce over Creamy Polenta


Graziano Marinara Sauce is made by a local company using only the freshest ingredients and I was really excited to try it. And now that I have, I'm excited to use it in my kitchen again.

 Photo courtesy of Graziano Products


 About Graziano Products -
Over a century ago, the Graziano family immigrated from the small Italian town of Guardia Perticara in the province of Potenza. Establishing themselves in Philadelphia, Pennsylvania, the young family was raised on the finest traditional Italian cooking. Over the years, friends and family alike have come to love the exceptional meals served from the Graziano kitchen. Graziano's founder, Thomas Graziano and his wife Jackie have continued the old world family tradition of enjoying home cooked meals every day of the week. They have maintained the classic integrity of the Graziano family recipes and they now look to share these delicacies with you. Chi mangia bene, Vive Bene!

When I got the sauce I fell in love with the packaging. The jar itself is rustic and screams home cooking, and the label is modern, bold, and perfectly simple. The two elements combine to make the perfect package.

Then you get a little closer to take a look at the sauce in the jar and you know how fresh it is. You can see the chunks of tomatoes and pieces of garlic and I could not wait to get it home and open it to smell and taste it.

I planned my menu for our Sunday family dinner using the sauce as my inspiration. I wanted something simple so the sauce could shine, yet comforting and rustic so I decided to roast vegetables and serve them in the sauce over creamy polenta (recipe follows at the end of this post). From looking at the jar I knew this sauce would give me the texture and consistency I wanted, and it did. And unlike every other jar of sauce I have ever tried, Graziano Marinara doesn't need any sort of "doctoring up."

This sauce is not your typical jarred sauce, but rather home cooking in a jar. The sauce looks and tastes of the freshest ingredients and it has the perfect balance of acidity and sweetness. You can taste all of the ingredients with none of them dominating the tomato flavor. The texture is exactly what I want in a good marinara sauce - the chunks of tomato let you know those are real tomatoes!

If you are looking for the perfect jar of marinara sauce, try Graziano Marinara. If you want to make a quick Italian meal that will taste like you cooked all day, use Graziano Marinara sauce. And even if you like making your own sauce sometimes you just don't have the time, right? This sauce will be the one  you can turn to in those situations. I know that I will definitely be cooking with this again, and soon!

To buy Graziano Marinara sauce locally you can purchase it at these stores:
   Olive Oil Etc., Doylestown Food Co-op, Del Val Market and None Such Farms in Doylestown, PA
   Tredici Market in Wayne Pa 
   Luigi and Giovanni's Market in Newtown Square
Coming soon - Graziano's Fra Diavolo will be available at Suzies Hot Shope in New Hope, PA very shortly.

Additionally, you can buy it online at www.grazianoproducts.com and have it shipped to you. You can follow them on Facebook - Graziano Products, LLC - and Instagram - @GrazianoProducts.  Finally, to meet the people behind this brand, I suggest you check out a great event being held in Doylestown, PA on February 26 - the Locavore. Details here.


Roasted Vegetables and Graziano Marinara Sauce over Creamy Polenta

Ingredients
  • 1/2 red pepper cut into 3 slices
  • 1/2 bulb of garlic separated into cloves and gently crushed
  • 1 sm zucchini, halved
  • 1 sm yellow squash, halved
  • 1 sm eggplant, halved
  • Handful of sliced mushrooms (crimini or baby bella)
  • Olive oil (I like using my oil mister for spraying the veggies)
  • 1.5 c low sodium chicken broth
  • 1/2 c whole milk
  • 1/2 c stone ground yellow cornmeal
  • Salt and pepper
  • Parmesan cheese
Directions
  • Preheat oven to 350 degrees
  • Place veggies on a baking sheet and gently mist with olive oil. Roast for 30 minutes or until the veggies are tender. Slice everything into bite sized pieces.
  • Put sauce in an oven safe sauté pan and gently heat. Stir in the veggies.
  • Optional: top with freshly grated Parmesan and put the pan under the broiler for 2-3 minutes.
  • While the veggies are roasting, make the polenta: Add chicken broth and milk to a medium pot and bring to a low boil. Reduce the heat and very slowly stir in the cornmeal - take your time to add it slowly and continuously stir so you don't get lumps. Continue to stir until you have a thick and creamy polenta. Season with salt, pepper, and Parmesan cheese.
  • Put polenta on a plate or in a flat bowl and top with the veggie-marinara mixture.  
Reviewers note: Graziano Products supplied me with a jar of sauce for the purpose of this recipe and review.


Thursday, February 5, 2015

Skillet Lasagna


Lasagna in less than 45 minutes and only one pot to wash. I'm not kidding!
 
I love lasagna but there is definitely a lot of work that goes into it. Making the filling, making the sauce, mixing the cheese, boiling the noodles, putting it all together and then waiting at least an hour to eat it. If you have a lot of time it's definitely worth it to make lasagna because there's nothing as comforting as baked, cheesy pasta, right? And there are some days when I crave being in the kitchen - it's therapeutic - so lasagna is a great meal to make on days like that. But really, unless you can prep everything early, who has the time for that on a weeknight?

That's why this skillet lasagna is THE ANSWER.

Between getting all the ingredients out, chopping the onion and garlic, making the sauce, layering the lasagna and baking it in the oven, I had this on the table in just under 45 minutes. And of that time only about 18 minutes are spent actively doing something. Even better, my husband who isn't a big lasagna fan really liked this, and said he liked it even better than traditional lasagna! My 4 year old took the leftovers to school for lunch the next day and asked if we can have it for dinner every night. I'd say that's a success.

Skillet Lasagna
Original Recipe

Ingredients
  • 1/2 Tbsp olive oil
  • 1/2 medium onion, chopped
  • 2 cloves garlic, minced
  • 1/2 lb ground beef
  • 8 oz canned diced tomatoes
  • 14 oz tomato sauce (I used Trader Joe's Tomato Basil Marinara; if you use a sauce without herbs in it, add some dried oregano and basil to your meat mixture)'
  • 1 c ricotta cheese
  • 1 c grated mozzarella cheese
  • 1/2 c grated Parmesan cheese
  • 1 Tbsp dried parsley
  • Salt and pepper
  • 5 no boil lasagna noodles broken into 4-5 pieces each
Directions
  • Heat the oven to 400 degrees
  • Heat the olive oil in an oven safe sauté pan or cast iron pan
  • Add the onions and garlic; sauté 2 minutes
  • Add the ground beef and cook until no longer pink, about 7-8 minutes
  • Add the diced tomatoes and tomato sauce and simmer, stirring occasionally, until slightly thickened, about 5 minutes.
  • In the meantime, mix the ricotta, most of the mozzarella, half of the Parmesan, the dried parsley, salt and pepper in a small bowl.
  • Remove 2/3 of the meat sauce from your pan. Top the remaining sauce with half of the noodles, followed by a layer of the mixed cheese and then half of the reserved meat sauce. Repeat with a layer of noodles, cheese, and then the rest of the sauce. Top with the remaining mozzarella and Parmesan cheese. (You want to make sure all of the noodles have sauce or cheese on them so they don't dry out)
  • Cover with foil and bake 22-25 minutes until the noodles are soft and the entire thing is hot and bubbly.
  • Let it sit for just a few minutes before serving.
 

Thursday, January 29, 2015

Cooking for the Big Game

Do you watch the Super Bowl at home, out, or at a house party?

We usually watch at home, but have also gone to house parties over the years. And while I like football (something about the sounds of football that I really love!), I don't really have a team of my own and I'm not all concerned with who wins. For me it's more about the commercials, half-time, and of course, the food.

Fun appetizers are a must for game watching. Couldn't you just make a meal out of appetizers? I totally could and always go overboard when making apps - there's no such thing as too much in my opinion.

Here are some of my favorite apps to make for friends and family - I hope you find some to add to your game day grub! For the complete list of my apps, check out the Appetizer page of my Recipe Index.

Dips

This Caramelized Onion, Bacon and Gruyere Dip is one you will want to sit in front of and not move. It has been a big hit every time I have made it.


If you have two minutes you can make this Loaded Baked Potato Dip.


Jalapeno Popper Dip.  Need I say more?


And for something a little fancier, try this Creamy Sundried Tomato Pesto Dip. Sundried tomatoes, artichokes and hot and bubbly cheese - yes please!


Bite-Sized

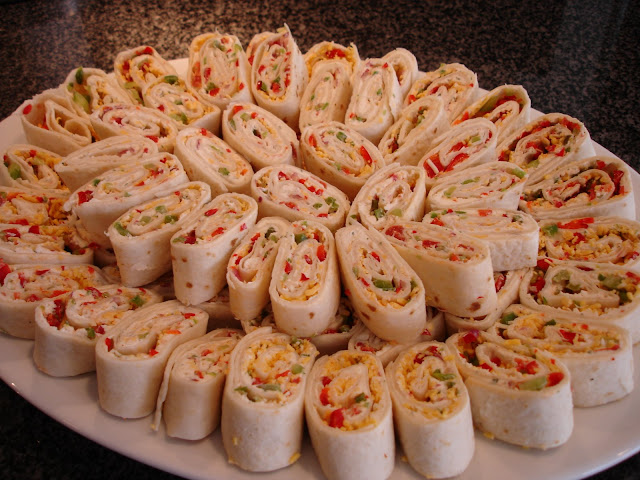
These Tortilla Pinwheels are one of the simplest appetizers on my blog and they get the most hits! I make them for almost every party and have brought them to many gatherings. By the end of the party I always have several people asking for the recipe. Best thing about them - you make them the night before, wrap them up and store them in the fridge overnight. When it's time for the party, just slice and serve.


My mouth is watering thinking about these Loaded Baked Potato Bites. Aren't they so cute?


I love pizza. Serve it up in a adorable little package with these Pepperoni Pizza Rolls.


And one fancier option, French Onion Cheese Bread.


Some Main Dish Ideas
Want something more than apps but still keeping with the Big Game theme? Try these -

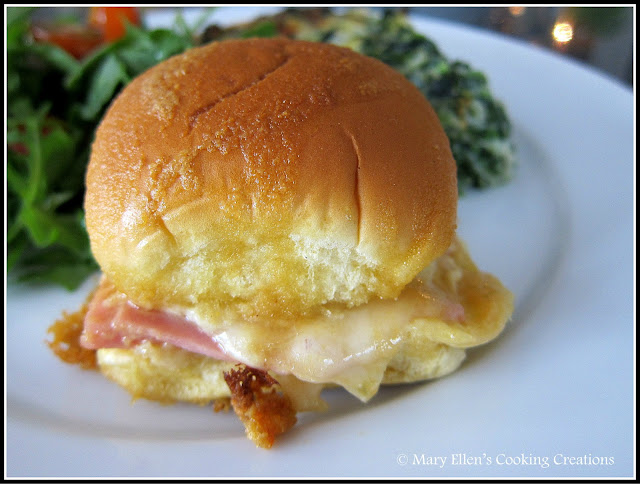
Sweet Ham and Swiss Sliders


White Chicken Chili


The Easiest & Creamiest Mac-n-Cheese. I'd serve this one up with some kielbasa or sausage on the side.


Spicy Taco Chili


Love Spinach Artichoke Dip? Look at these Chicken Spinach Artichoke Stuffed Shells.